 Tires
Tires
You wash the car, apply tire dressing, and the tire looks amazing—deep black, vibrant, with that showroom shine. But the next day, it feels like it evaporated. Or worse: the tire gets blotchy, runs, smears onto the wheel, and attracts dust like a magnet. If you’ve been through this, if the tire “shines” and the next day it’s gone, something’s wrong. And the problem is almost never “the tire won’t hold product.” Most of the time, the issue is rubber preparation, product choice, and—above all—the way it’s applied.
The truth is simple: tires are porous rubber, exposed to sun, heat, water, friction, and chemicals. So when you put any dressing over a dirty or contaminated tire, you’re basically applying “makeup” to a surface that isn’t ready for protection. The result is short-lived shine, uneven appearance, and low durability.
In this article, you’ll understand why the shine disappears so fast, what truly makes tire dressing last, which mistakes are sabotaging your results, and a practical step-by-step to achieve a beautiful, consistent finish—whether you prefer glossy shine or a more satin look.
Why does the shine disappear overnight?
When the shine fades quickly, one (or more) of these situations is usually happening:
1) The tire was still dirty (even if it “looked clean”)
Many people wash the tire only with car shampoo and think the job is done. However, tires build up soot, oil, asphalt residue, and embedded grime. As a result, the product doesn’t bond: it sits on top of contamination and comes off easily.
2) The rubber was “oily”
Residue from older products (especially very oily ones) leaves a film that prevents bonding. So you apply it, it looks shiny, but it doesn’t last.
3) Too much product
Excess is the enemy of durability. When you soak the tire, what’s left over doesn’t “cure”: it runs, attracts dust, and disappears with the first rain or the first drive.
4) Incorrect application
Applying with a dirty sponge, a contaminated towel, without spreading evenly, or without allowing drying time creates streaks and reduces adhesion.
5) The wrong product for your goal
There are products for wet gloss, moderate shine, satin finish, and longer-lasting protection. If you use the wrong one for your expectation, you’ll be disappointed.
That’s why it’s worth repeating: if the tire “shines” and the next day it’s gone, something’s wrong—and it’s almost always fixable.
The biggest secret: prep the tire like you would paint
Many people are meticulous with paint: decontaminate, dry, protect. But when it comes to tires… they “apply whatever.” Yet tires also need preparation. The base is what determines whether the product will last.
Deep cleaning (for real)
The tire must be free from:
In other words, it’s not just “washing”—it’s decontaminating the rubber.
How do you know if it’s still dirty?
Here’s a simple test: after cleaning, scrub with a tire cleaner (or an APC at a safe dilution) and watch the foam. If the foam turns brown, there’s still embedded grime. Repeat until the foam comes out clear. Then yes—the tire is ready.
A nice shine isn’t “greasy mess”: what a proper finish looks like
There’s a huge difference between:
Greasy shine usually doesn’t last long and makes everything dirty. Plus, it can sling onto the paint while driving and stain the car’s sides. Therefore, the goal should be: good-looking finish + dry-to-the-touch feel.
The most common mistakes that kill durability
Mistake 1 — Applying on a wet tire
If the tire is wet, you dilute the product immediately. Consequently, bonding decreases and durability disappears. The right approach is applying on a dry or slightly damp tire (depending on the product), but never soaking wet.
Mistake 2 — Not removing the excess
Even the best dressing in the world suffers if you skip the finishing step. After applying, wait a few minutes and wipe off the excess with a microfiber towel. This prevents runs and helps achieve a dry finish.
Mistake 3 — Ignoring cure time
Some products need time to settle and form a film. If you drive right away or get caught in rain soon after, the effect is lost. Whenever possible, keep the car parked and protected for a while after application.
Mistake 4 — Using the same applicator for everything
A tire applicator should be dedicated. If you use the same sponge that has touched APC, degreaser, or wheel cleaner, you contaminate the application and change the result.
Mistake 5 — Confusing “dressing” with “sealant”
Tire dressing provides appearance and light-to-moderate protection. Specific sealants (including SiO₂-based options) tend to offer greater durability and resistance. If your goal is “weeks,” choose a product designed for that.
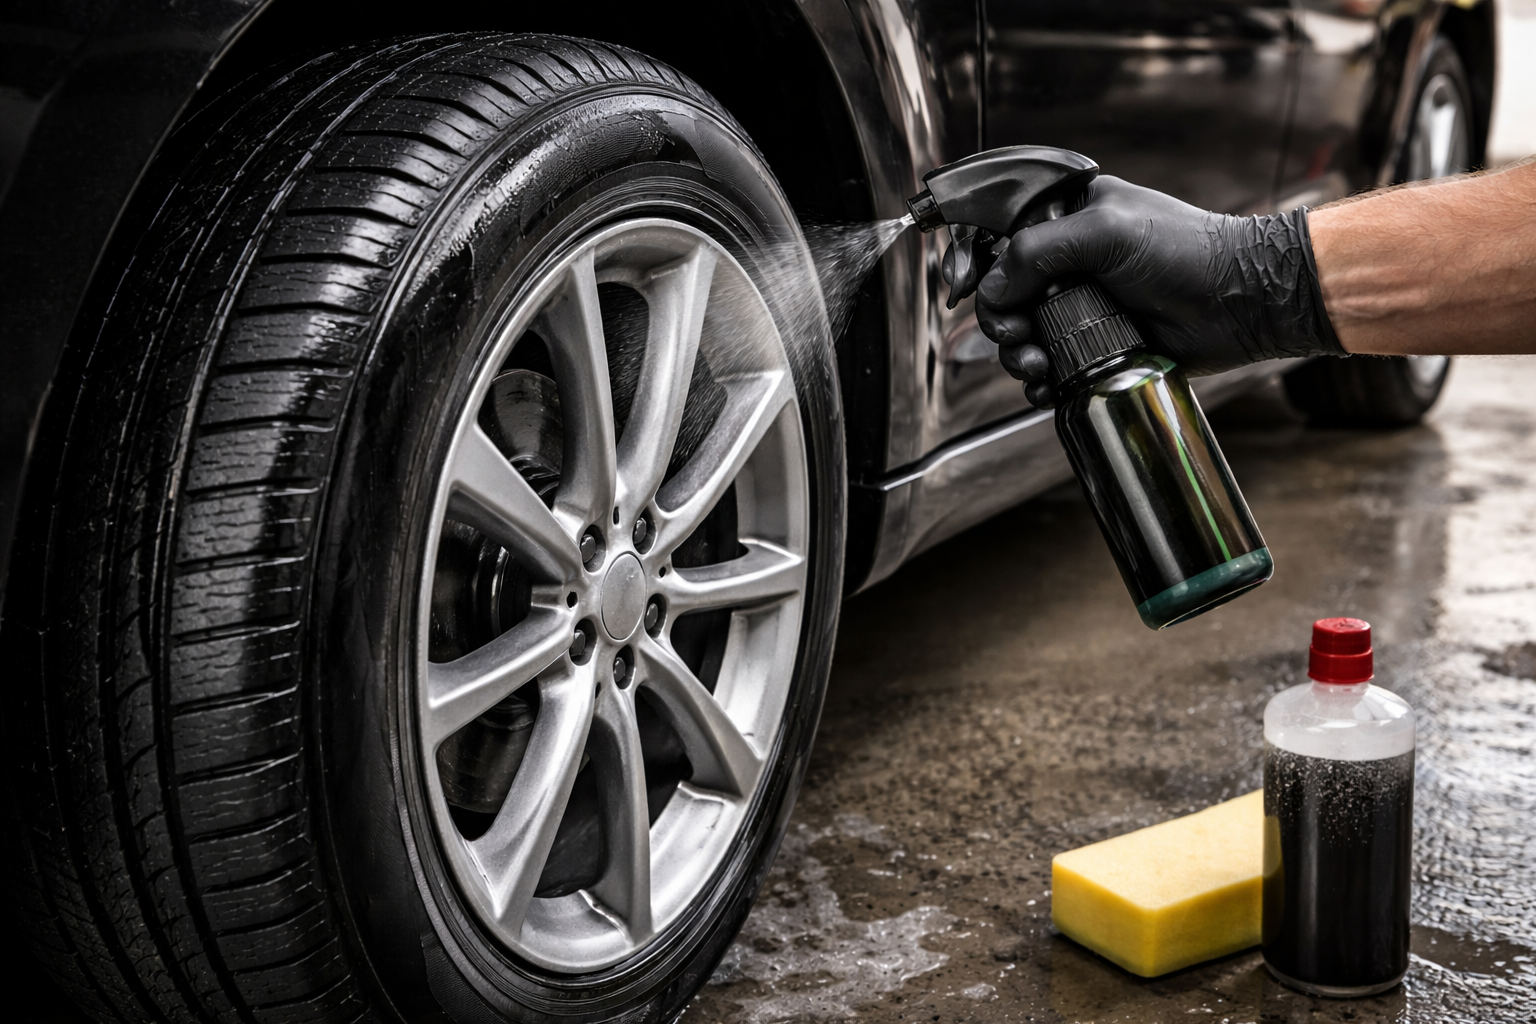
Step-by-step: how to make tire dressing last for real
Below is a practical routine that works in most scenarios:
1) Pre-wash the tire/wheel set
Use a suitable cleaner like Delet Vonixx for the tire and a firm-bristle brush.
2) Scrub until the foam comes out clear
This is the game-changer. Do 1, 2, or 3 cycles if needed. When the foam stops turning brown, you’ve removed the embedded grime.
3) Rinse thoroughly and dry
Rinse generously and dry the tire. You can use a dedicated towel or air. The drier it is, the better the bonding.
4) Apply a thin, even layer
Use a small amount on the applicator and spread uniformly. If the tire is very “thirsty” (highly dried rubber), apply a second light coat after the first one settles. Products like Durax and Shiny Vonixx help renew the rubber’s appearance.
5) Settle time + remove excess
Wait a few minutes. Then wipe with microfiber to level and remove excess. This prevents tackiness and increases durability.
6) Cure before water exposure
If possible, avoid getting it wet for a few hours. This greatly increases the life of the finish.
Glossy or satin? How to choose the right look
Not everyone wants “mirror tires,” and that’s fine. The key is aligning expectations:
Regardless of the finish, the rule remains: prep + thin coat + finishing wipe.
Ideal frequency and quick maintenance
To keep a consistent standard without rework:
Also, if you notice the tire is “drinking” a lot of product, that indicates drier rubber. In that case, consistency and thin layers help restore the look over time.
When the issue isn’t application: signs of a heavily degraded tire
Sometimes the tire is so dried and oxidized that the finish looks uneven even with correct technique. Signs include:
In these cases, you can still improve a lot with deep cleaning and the right product, but durability may be lower than on new or well-maintained tires.
Conclusion: if it fades fast, it’s not “normal”—it’s a process issue
If your tire shines today and is dull tomorrow, that doesn’t have to be your standard. In practice, if the tire “shines” and the next day it’s gone, something’s wrong: either the rubber wasn’t truly clean, there was too much product, or you skipped finishing and cure time.
The good news is that with the right step-by-step, you can achieve a nicer, more uniform, longer-lasting finish—without smearing, without staining, and without rework. And when you get the process right, the tire stops being “the detail that’s a hassle” and becomes the final touch that elevates the whole car.
Sign up to receive useful tips and content.