 Details
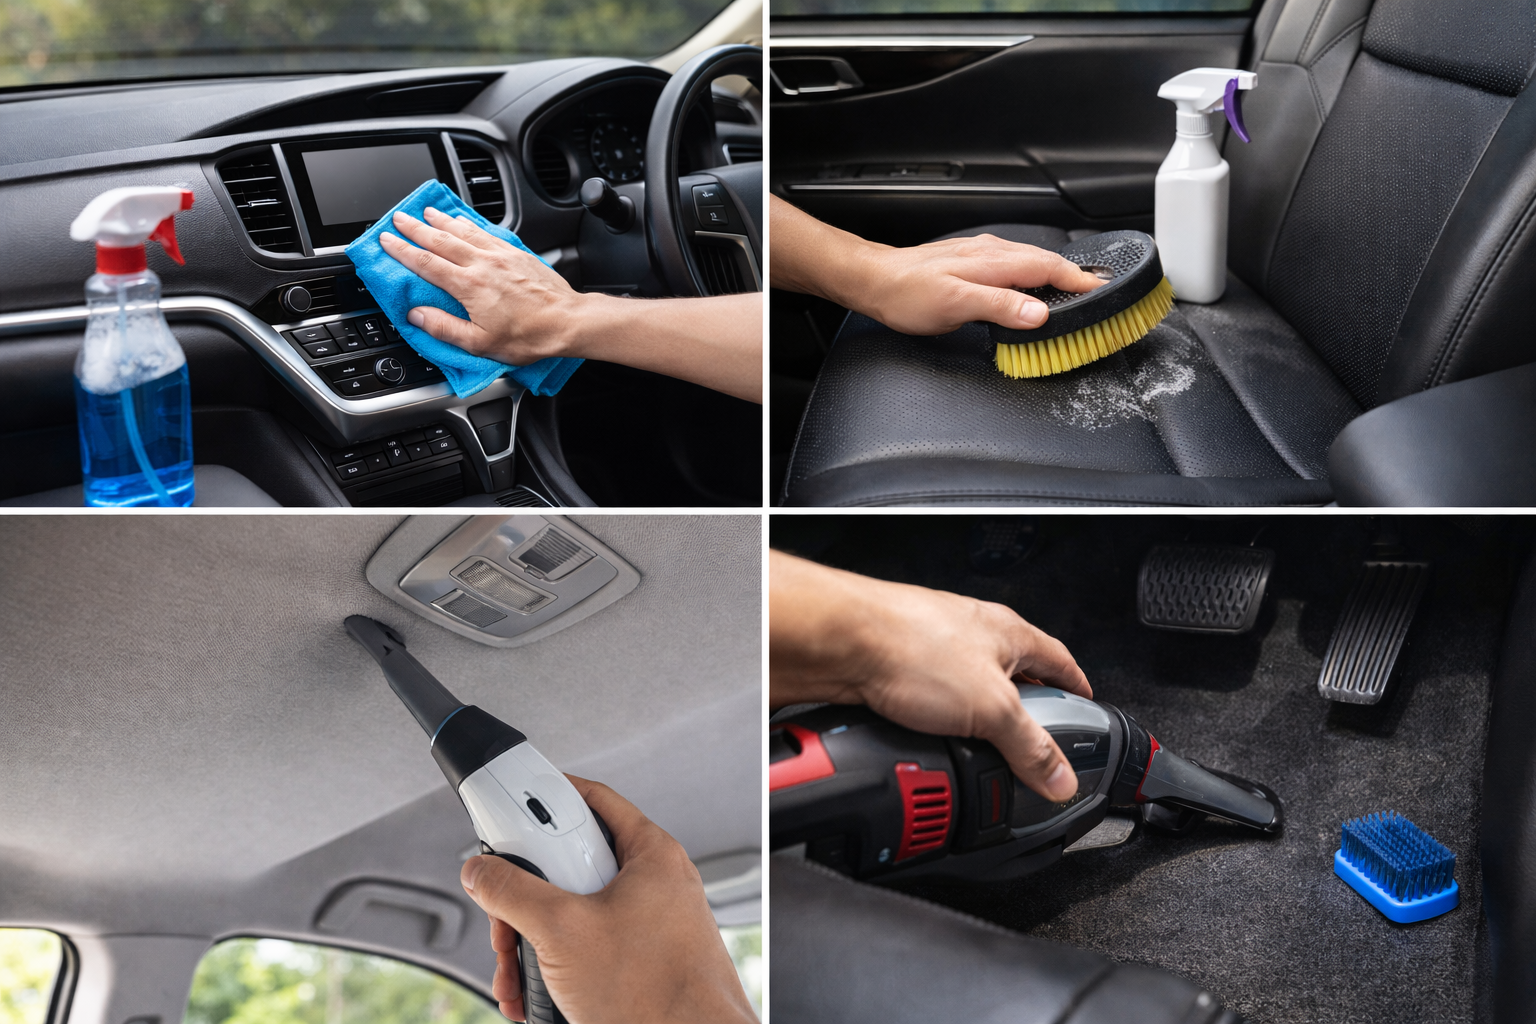
Keeping a car’s interior clean goes far beyond aesthetics. A sanitized interior environment contributes to passenger comfort, preserves the vehicle’s materials, and helps maintain the car’s value over time. However, many people perform only superficial cleaning, leaving several important areas without the necessary attention.
For this reason, a complete interior cleaning should be carried out in an organized and strategic way. When an area-by-area checklist is followed, the entire process becomes more efficient and helps ensure that no part of the vehicle’s interior is overlooked.
In addition, when the correct products and methods are used, the car’s materials are preserved, preventing premature wear, stains, or drying. Therefore, understanding how to structure a complete interior cleaning is essential to keep the vehicle consistently pleasant and well maintained.
Below is a complete checklist by area to help perform the cleaning in a professional manner.
Preparation before interior cleaning
Before starting the cleaning process, some preparatory steps should be completed. Although they may seem simple, these steps help optimize the final result.
First, all personal items should be removed from the vehicle’s interior. Bottles, papers, glove compartment items, and loose accessories should be taken out so that cleaning can be performed more accurately.
Next, an initial vacuuming of the interior should be performed. This allows loose dust, sand, and small particles to be removed before wet cleaning begins.
Additionally, the doors should be opened to improve ventilation inside the vehicle. As a result, the drying of materials will be facilitated during the process.
Only after this preparation should the detailed cleaning begin.
Dashboard cleaning checklist
The dashboard is one of the most visible areas of the car’s interior and, at the same time, one of the areas that accumulates the most dust. This happens because dashboard materials often have electrostatic properties that attract particles.
First, superficial dust should be removed using a soft detailing brush or a specific automotive detailing brush. This step helps loosen dirt from difficult areas such as air vents, buttons, and crevices.
Next, a cleaning product specifically designed for automotive plastics should be applied. The application is usually done with a foam applicator or a microfiber cloth. Example: Sintra Vonixx for cleaning.
After cleaning, the excess product should be removed with a clean cloth. This ensures a uniform finish.
Additionally, if desired, a protector for interior plastics can be applied afterward. This type of product helps reduce drying caused by sun exposure and also reduces dust accumulation. Examples of protection products: Tryon and Intense Vonixx.
Dashboard checklist:
Seat cleaning checklist
Seats are responsible for a large portion of the comfort inside the vehicle. However, they are also among the areas that accumulate the most dirt, sweat, and organic residues.
Depending on the seat material, the cleaning method may vary. Fabric seats, natural leather, or synthetic leather require different care.
Fabric seats
On fabric seats, dirt tends to penetrate the fibers of the material. For this reason, careful vacuuming should be performed first.
After that, a cleaner specifically designed for automotive fabrics such as Vertex Vonixx should be applied. The product is usually spread using a soft brush or applicator.
After the product has acted, the excess should be removed with a slightly damp microfiber cloth.
Checklist for fabric seats:
Leather seats
For leather seats, extra care must be taken, as inappropriate products may cause drying.
First, the surface should be cleaned with a cleaner specifically designed for automotive leather. Example: Higicouro Vonixx.
Afterward, it is recommended to apply a leather conditioner, as this type of material loses moisture over time. Example: Hidracouro Vonixx.
Checklist for leather seats:
Headliner cleaning checklist
The automotive headliner, also known as the roof liner, is often a neglected area during interior cleaning. However, stains and odors may accumulate in this region over time.
An important precaution must be observed: excessive moisture should not be used on the headliner because the fabric is glued to the vehicle structure.
First, a light vacuuming of the surface is recommended.
Next, a small amount of a specific cleaner should be applied. The product is usually spread using an extremely soft brush or microfiber cloth. Example: Sintra Vonixx.
Headliner cleaning checklist:
Carpet and floor mat cleaning checklist
Car carpets are constantly exposed to dirt, dust, sand, and debris brought in by shoes.
For this reason, this area often requires deeper cleaning.
First, the floor mats should be removed from the vehicle. Then a complete vacuuming should be performed on both the mats and the interior carpet.
After that, a fabric-specific cleaner can be applied. In cases of heavier dirt, light brushing may be performed.
Carpet checklist:
Benefits of performing a complete interior cleaning
When a complete interior cleaning process is performed, several benefits can be observed.
First, the interior environment becomes more pleasant. In addition, unwanted odors are reduced.
Another important point is material preservation. Plastics, fabrics, and leather tend to last longer when they are cleaned regularly.
Furthermore, the vehicle’s value can also be maintained. Cars that are well preserved internally often achieve a better resale value.
Finally, comfort and the driving experience are also improved.
How often interior cleaning should be performed
The frequency of interior cleaning may vary depending on vehicle usage.
In general, it is recommended that:
However, vehicles that transport children, pets, or operate in dusty environments may require more frequent cleaning.
Conclusion
A complete interior car cleaning is an essential step to keep the vehicle comfortable, well preserved, and valuable. However, to achieve truly efficient results, each area must be treated properly.
When an area-based checklist is followed — including the dashboard, seats, headliner, and carpets — the process becomes more organized and efficient.
In addition, when proper products are used and cleaning is performed regularly, the vehicle’s interior remains pleasant, odor-free, and looking new for much longer.
Therefore, incorporating a routine of complete interior cleaning is a simple practice that can generate significant benefits for both the vehicle and the driving experience.
Sign up to receive useful tips and content.