 Washing
Many people think the danger to paint is only during washing: the shampoo, the sponge, the strong jet of water. However, there’s one step that, in practice, scratches and stains more than the wash itself. And it’s simple, quick, and often done on “autopilot”: drying. Yes—drying the wrong way creates scratches and water spots. And when that happens, the paint loses gloss, develops micro-scratches (those famous swirl marks), and picks up water spots that seem impossible to remove.
Drying is the moment you touch the paint after it’s clean. So any technique mistake, any contaminated towel, or any rush becomes friction. And friction on automotive clear coat becomes marks. In addition, when water evaporates on its own, minerals remain behind. The result is spotting—especially on dark cars and in areas with “harder” water.
In this article, you’ll understand why drying is so critical, which common mistakes ruin paint, how to choose the right method and materials, and—most importantly—a safe step-by-step to dry your car and keep it looking like new.
Why is drying so risky for paint?
Automotive paint has a clear coat layer that protects and adds shine. However, that clear coat is more sensitive than it seems. When you dry:
That’s why drying the wrong way creates scratches and water spots through two paths at the same time: friction (micro-scratches) and evaporation (mineral spots).
Also, when you drag a towel with pressure, you’re basically “polishing in reverse”—creating fine scratch trails that, under the sun, show up like a spider web.
Water spots: what they are and why they appear
The most common drying stains are water spots. They happen when water evaporates and leaves behind minerals like calcium and magnesium. In other words: it’s not “dirt,” it’s “residue.” And the hotter the panel, the faster the water dries—and the more it marks.
That explains why:
Consequently, letting the car “air dry” almost always becomes a headache.
The mistakes that create the most scratches and spots (and how to avoid them)
Mistake 1 — Drying with a regular cloth (or bath towel)
Household towels have harsher fibers and aggressive stitching. Also, they aren’t designed to absorb without dragging. Therefore, the risk increases a lot.
How to avoid it: use a dedicated drying microfiber towel with high absorption and safe edges.
Mistake 2 — Using the same microfiber you use on the interior
Microfiber that touched the dashboard, leather, or tire products carries silicone and dirt. So when you dry the paint, you spread contamination and can create haze and spotting.
How to avoid it: your drying towel should be exclusive to paintwork.
Mistake 3 — Pressing hard and dragging
Many people dry by “scrubbing.” However, the correct technique is to reduce friction. The more pressure, the higher the chance of micro-scratches.
How to avoid it: use light movements—preferably “lay and pull” with minimal contact.
Mistake 4 — Drying while the car still has dirt in critical areas
Wheel wells, trim, badges, and grilles hold grime and release residue during drying. Then you wipe—and the towel becomes sandpaper.
How to avoid it: rinse details thoroughly, use a brush where needed, and leave these areas for last.
Mistake 5 — Drying in the sun with hot paint
When the paint is hot, water evaporates fast and leaves marks. Also, the towel can “grab” more and increase friction.
How to avoid it: dry in the shade and on a cool surface whenever possible.
So notice: drying the wrong way creates scratches and water spots, but drying the right way is basically reducing contact and controlling evaporation.
Materials and methods that change everything
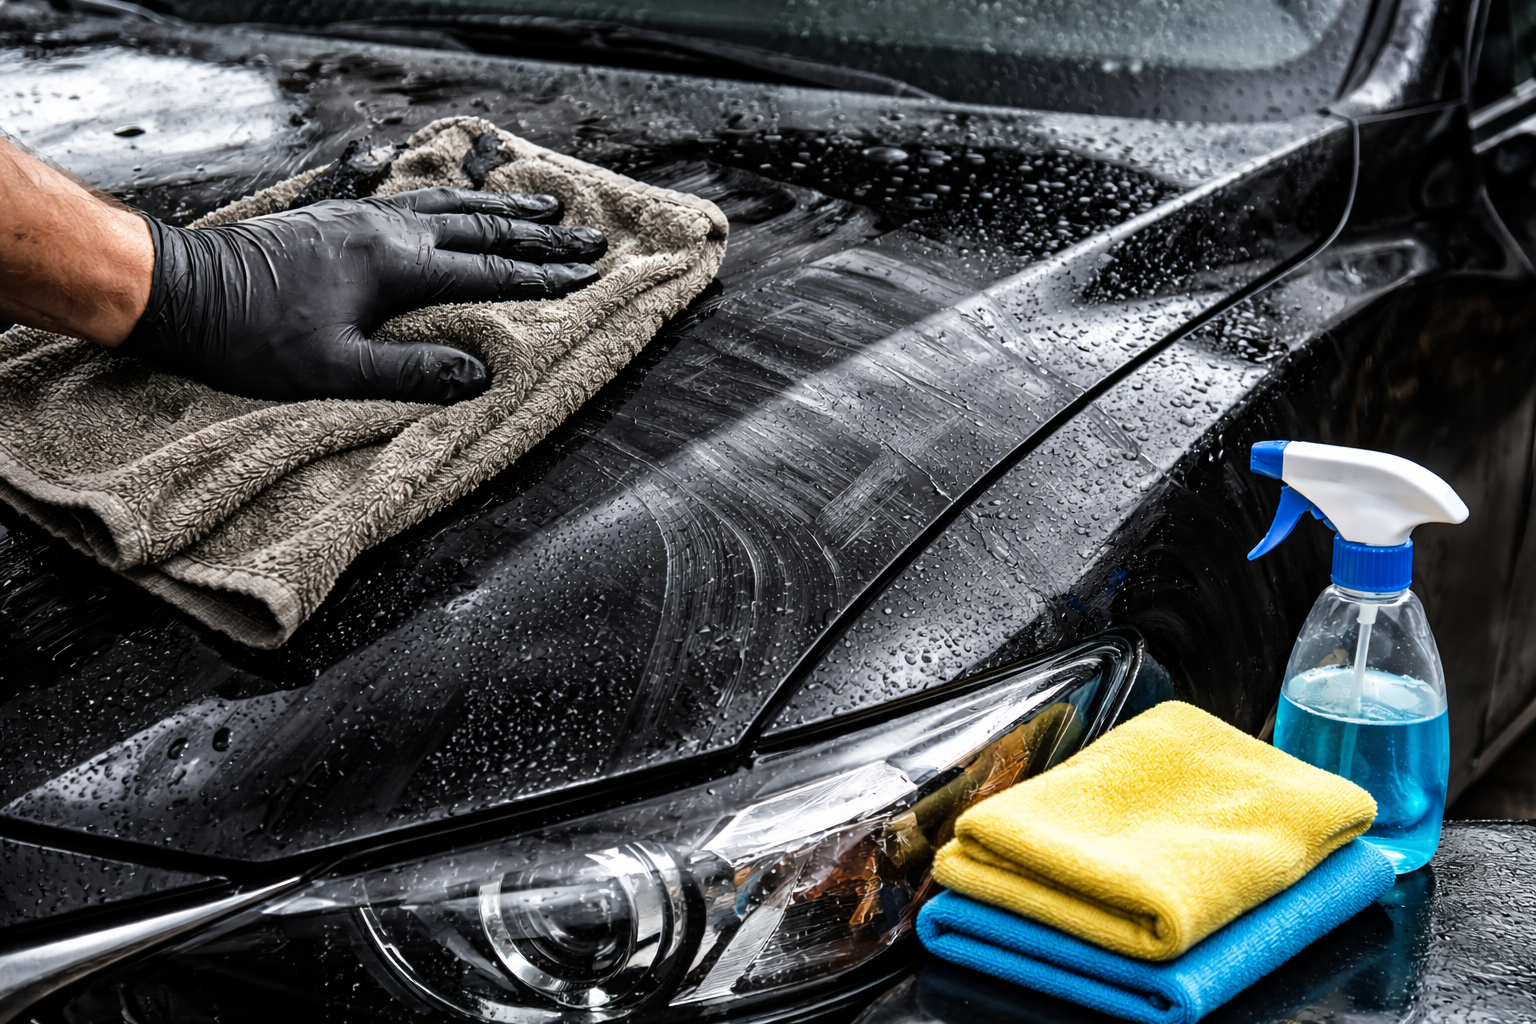
1) A high-GSM microfiber drying towel
It absorbs a lot, reduces the number of passes, and lowers friction. So it’s the most important item.
2) An air blower (or compressed air)
Great for removing water from badges, mirrors, grilles, and trim. It also reduces contact with the paint.
3) “Assisted drying” with a product (protective spray)
Sprays that add lubrication and protection during drying reduce friction and increase shine. They also help prevent spotting. Example: Hydrox Vonixx.
Important: a product doesn’t replace technique. It helps—but if the towel is dirty, it will scratch the same way.
Step-by-step: how to dry your car without scratching or spotting
Step 1 — Choose the right moment
Whenever possible, wash and dry in the shade. If you can’t, work in sections: rinse and dry one panel at a time. That way you avoid fast evaporation.
Step 2 — Do a smart final rinse
Before drying, do a thorough rinse. The less residue left behind, the lower the chance of scratching. If you can, a “sheeting” rinse (low turbulence) helps water run off and reduces the amount you need to dry.
Step 3 — Remove water from crevices first
Use a blower or a small dedicated microfiber for:
This prevents water from dripping later and creating spots.
Step 4 — Dry with the towel, gently
Lay the towel over the panel and pull lightly. Avoid circular motions. Start from the top areas (roof, hood, trunk), then move down to the sides. This reduces the risk of dragging dirt from lower areas upward.
Step 5 — Final wipe and inspection
After drying, use a clean, dry towel to check if any marks remain. If a spot appears, fix it right away before it sets.
Drying technique: longer-lasting gloss and fewer micro-scratches
Drying has two goals:
When you master this, you’ll notice the paint looks better even without polishing. And that matters because polishing corrects—but it also removes clear coat. So the less you need to correct, the longer your paint will last.
So yes: drying the wrong way creates scratches and water spots, but drying the right way preserves clear coat, saves time, and keeps the car looking great for much longer.
Frequency and upkeep: what to do between washes
If the car caught light rain and only has droplets, don’t rub it with a dry towel. That creates scratches. Instead, choose:
Also, keep towels clean: wash microfiber correctly, avoid fabric softener, and separate towels by use. This simple organization prevents 90% of “mysterious” scratches.
Conclusion: drying is the “final step” that defines the result
You can wash with perfect technique. But if you dry the wrong way, you lose everything. Because drying the wrong way creates scratches and water spots—and that shows in the sun, in photos, and day to day.
The good news is that drying well isn’t complicated: shade, the right towel, light pressure, the correct order, and attention to crevices. When you apply this method, you reduce micro-scratches, prevent mineral spots, and keep the gloss alive much longer.
In the end, drying is the detail that separates a “clean car” from an “impeccable car.”
Sign up to receive useful tips and content.